Firewood v2 Camper Guides
Creating an Account
Changing Registered Price Point
Using A Camp Credit
Duplicate Registrations
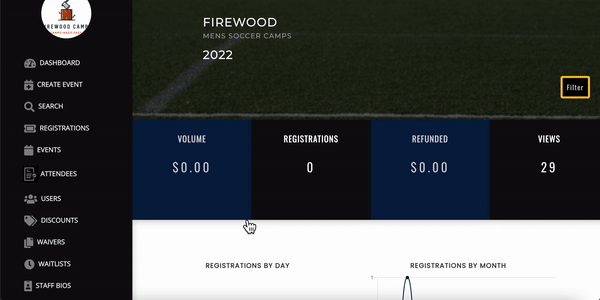
Camp Information
Requesting a Refund
Changing Camps
Changing Account Information
Registering for Camp
Firewood v2 Client Guides
Getting Started
01 - Incorporating Your Business / Setting Up A LLC
02 - Connecting to Stripe
03 - Adding Liability Waiver
04b - Adding Slideshow Images
05 - Adding Staff Bios
06 - Adding FAQS
07 - Adding a Location
08 - Your First Event
Creating and Editing Events
Milestones
Opening / Closing Registration
Price Points
Exporting Player Information to a CSV File
Creating An Event
Cloning A Camp
Editing a Discount
Customizing Registration Flows using Data Templates
Registrations
Searching
Registrations
Deleting a Registration
Viewing the Event Registrations List page
Editing A Campers Information
Changing a Player's Price Point
Default Waivers
Inactive Registrations
Issuing a Refund
Switching a Campers Status
Switching Camper to a Different Camp
Marketing and Data
Customizing your Website
Admin Information
Resources
Troubleshooting Password Emails
Disputes (Chargebacks)
Refunding Orders
Uploading Image Files
Do my users receive confirmation emails? What is in them?
Firewood v3 Docs
Firewood v4 - Client Guide
Apple Pay x Firewood Camps
Google Wallet with the Firewood platform
About Firewood Quickpay
Firewood v4 - Role Glossary & Admin Permissions Breakdown
Firewood v4 Rollout Doc
Waiting on Your First Firewood + Stripe Payout? Here's What to Know
Fee Breakout Settings
When Do Camps Close, Unpublish, and Move to Past Events?
Firewood Data Template Datapoint Glossary
- All Categories
- Firewood v2 Client Guides
- Getting Started
- 07 - Adding a Location
07 - Adding a Location

Overview:
Firewood makes it easy to add locations to your directions and event pages.
Instructions:
- Sign in to your Firewood site.
- Click the "Locations" tab found on the left side of your Admin Dashboard.
- Click the "+ Locations" button found in the top right corner and enter the address to add a new location.
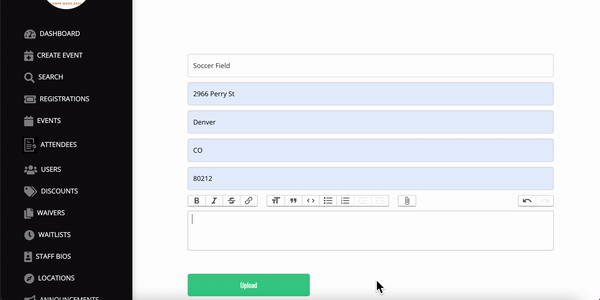
- Add an image and description to your location. This is optional.
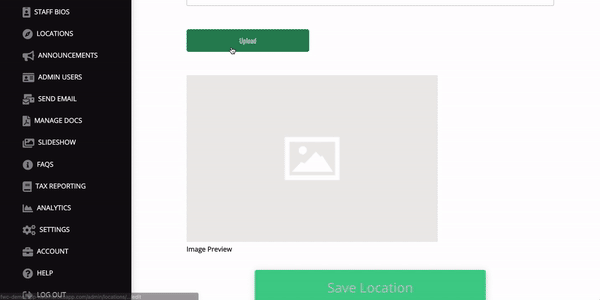
- Click "Save" to add your location.
- The location is now available from your Directions/Travel tab and will automatically embed Google Maps links for any event page it is attached to.